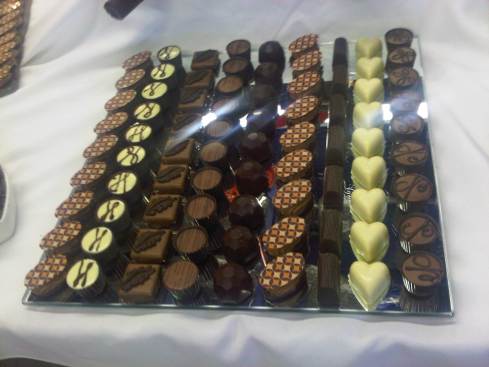
I just spent three amazing days with Master Chocolatier Jean-Pierre Wybauw. What a wonderful experience! Here is a sneak peak of some of my creations .. More to come.
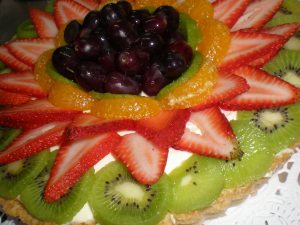
Tarte aux Fruits
14 MayTarte aux Fruits or Fruit Tart is one of my favourite desserts! Go to any patisserie in Europe and North America and you are sure to see these amazing-looking fruit tarts in the window.
They are light and so versatile. This classic French dessert has three components – sweet pastry crust, rich pastry cream and loads of fresh fruit. You can opt to use one fruit but I think a medley of fruits makes for a beautiful tart.
Fruit tarts can be decorated with mangoes, pineapple, bananas, lychee, tangerines, grapes, peaches, kiwi and berries if they are available. Just think vibrant colours!
For this dessert you will need a 9 inch or 10 inch fluted tart pan.
Tart Shell
1 egg yolk
2 tbsp cold water
1 tsp vanilla
1¼ cups flour
1/3 cup sugar
¼ tsp salt
4 oz butter (cut into 1/4 inch pieces)
Method:
- In a small bowl stir together the egg yolk, water, vanilla and set aside
- In a stand mixer, combine the flour, sugar and salt
- Add the butter and mix until the mixture resembles coarse cornmeal
- Add the egg mixture and mix until dough pulls together
- Cover dough with plastic wrap and refrigerate for 30 minutes
- Roll out the dough to 1/16-inch-thick circle, large enough to hang slightly over the sides of a 10-inch tart pan with removable bottom
- Place dough in pan. Cut off excess dough with a sharp knife or your thumb. Line tart shell with aluminum foil, and fill with a pie weight or rice. Allow dough to rest for another 30 minutes before baking
- Bake for 20 minutes at 350 degrees Fahrenheit. Remove pie weight and foil and bake another 10 minutes until brown
- Cool to room temperature and then carefully remove the tart shell (allowing the side to fall away) and slide onto a serving platter.
Pastry Cream
3 egg yolks
1/3 cup sugar
1 pinch salt
2 tbsp cornstarch
1 cup milk
1 tsp vanilla
Method:
- Using stand mixer beat egg yolks, sugar and salt on medium speed until mixture is light yellow in colour. Add the cornstarch until fully combined
- Bring milk and vanilla extract to a simmer. Pour half the of milk into egg mixture whisking constantly. Whisk in the remaining milk and then pour the milk and egg mixture back into the saucepan
- Stir the mixture constantly over medium heat, using a wooden spoon until mixture is thick
- Remove from heat and pour pastry cream in to a bowl. Place plastic wrap directly onto the pastry cream and chill for approximately two hours.
Warm apricot jam and water in a saucepan until it liquefies. Pour through a sieve to remove any lumps. Using a pastry brush, glaze fruit with apricot jam.
Assemble Tart
Components for fruit tart can be made a day ahead of serving however they are best eaten the same day they are assembled.
Fruit tarts are perfect for lunch or teatime. Enjoy!!
Tarte Tatin
9 May I seem to have a love affair with the French classics. Tarte Tatin which means “tarte made in the style of the Tatin sister” like many classic dishes and desserts came about purely by accident.
Legend has it that the dessert was created by Stephanie Tatin who owned and operated l’Hotel Tatin with her sister Carolina in France back in 1888. There are conflicting stories as to how this upside down apple tart came about but the long and short of it is that Stephanie placed a pie crust on top of apples with butter and sugar and a signature dish for the hotel was created.
The ingredients apples, butter and sugar are placed in a shallow baking dish and covered with a pie crust and baked. When inverted on a plate you have a beautiful apple tart with a delicious caramel topping. When you think about it Tarte Tatin is similar in a sense to a Pineapple Upside Down Cake but more sophisticated.
Tarte Tatin has to be made with firm dessert apples, such as Granny Smith or Golden Delicioius apples although the original was made with two regional apple varieties: Reine des Reinettes (King of the Pippins) and Calville.
Here is my version of the classic!
Pie Dough:
- 6 oz. cold unsalted butter (cut into small pieces)
- 2 cups all-purpose flour
- 1/4 cup sugar
- Pinch salt
- 1 egg, beaten
- 1/8 cup very cold water
- 1 tsp vanilla extract
Filling:
- 2 oz. butter
- 1/4 cup dark brown sugar
- 4 medium Granny Smith or Golden Delicious apples (approx. 2 pound) peel, cored and sliced
- Few dashes ground cinnamon
Directions
In a stand mixer combine flour, sugar, and salt together on a low speed. Add butter and mix until dough resembles cornmeal. Whisk in egg, water, and vanilla and continue to until dough holds together. Chill the dough in the refrigerator for 30 minutes
While the dough is refrigerating, make the filling:
Preheat oven to 375 degrees F.
- Melt the butter and sugar together in a 12-inch nonstick oven-proof skillet over medium-high heat.
- Add the apple slices and stir to coat with melted butter mixture. Sprinkle with cinnamon and cook until apples have softened slightly and take on some color, about 15 minutes. Sprinkle with cinnamon.
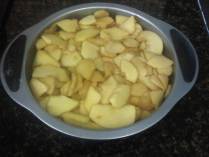
- Arrange the apples in a shallow 9 inch baking tin

- Roll out the refrigerated dough on a floured countertop into a 12-inch disk and lay over the top of the apples, trimming any excess. Prick with a fork in several places to let steam release.

- Bake for 40 minutes or until golden browned.
- Cool for 20 minutes and then invert tart onto serving dish
- Serve warm with a dollop of whipped cream or ice cream
Creme Brulee
5 MayMy friend Dulcie surprised me with lunch yesterday. After our meal, I graciously offered her some Crème Brulee for dessert. To my surprise she had never had it before! Crème Brulee is one of my all time favourite desserts. Hmm … I think I say that too much but if it’s on a restaurant’s menu it is a “must have” dessert for me. It has a smooth and creamy texture and a nice crunch from the carmelized sugar on top.
Creme Brulee is a classic French dessert that translates to burnt cream in English. It is a rich custard consisting of heavy cream, egg yolks, sugar and vanilla finished with caramelized sugar which is the main characteristic of this dessert. It is normally baked in ramekins in a water bath and then chilled. When ready to serve sugar is caramelized on top with a butane torch or placed under the grill in the oven.
Crème Brulee is versatile in that it can be flavoured with so many things .. coffee, coconut, chocolate, citrus and liqueur just to name a few.
Crème Brulee
4 servings
Ingredients
3 egg yolks
¼ cup white sugar
1 teaspoon vanilla extract
1 cup heavy cream
1 tablespoon brown sugar
1 tablespoon white sugar
Directions
- Preheat oven to 325 degrees
- Whisk egg yolks, ¼ cup white and vanilla in a mixing bowl until smooth
- Bring the heavy cream to a simmer over medium low heat. Remove the cream from heat immediately and slowly stir cream into the egg yolk until combined
- Strain the mixture and ladle into ramekins three-quarters full.
- Bake in a water bath until set (approx. 25-35 minutes).
- Remove ramekins from water bath and refrigerate until chilled.
- To finish crème brulee, Preheat oven to broil.
- In a small bowl combine remaining 2 tablespoons white sugar and brown sugar. Sprinkle evenly over each custard. Place dish under broiler until sugar melts, about 2 minutes. Watch carefully so as not to burn.
- Remove from heat and allow to cool. Refrigerate until custard is set again.
- Lightly dust with confectioners’ sugar and serve
The best part of making crème brulee is using the torch to add the finishing touch to the dessert!
